Group Makela Myllymaki Ly Lotvonen Hossen
Group members
- Max Mäkela
- Aki Lotvonen
- Ossi Myllymäki
- Hoa Ly
- Sheak Md Sazzad Hossen
Group Assignment
Xtool's different modes (text, image, etc..)
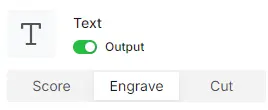
In the xtool software it automatically chooses a mode of output for each peice in your design, you can see here that it has text selected for this peice as it is text. Here you can also specify stuff like output where you can choose wether or not you want that peice included in the cut design.
Score cut engrave
| Score | Cut | Engrave |
|---|---|---|
| Kind of like cutting but without cutting the actual material, simply does an outline. | cuts out the specified design from the material | makes a small burn onto the top of the material in order to show images and other things, you can make full designs easier like the fab lab logo this way, whereas with scoring and cutting you would need each line in the image manually scored or cut. |
Selecting diffrent parameters for diffrent parts
Visually
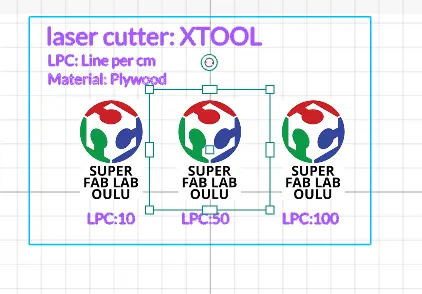 You can select a peice in the xtool software by clicking on it and changing its parameters.
Results
Rate
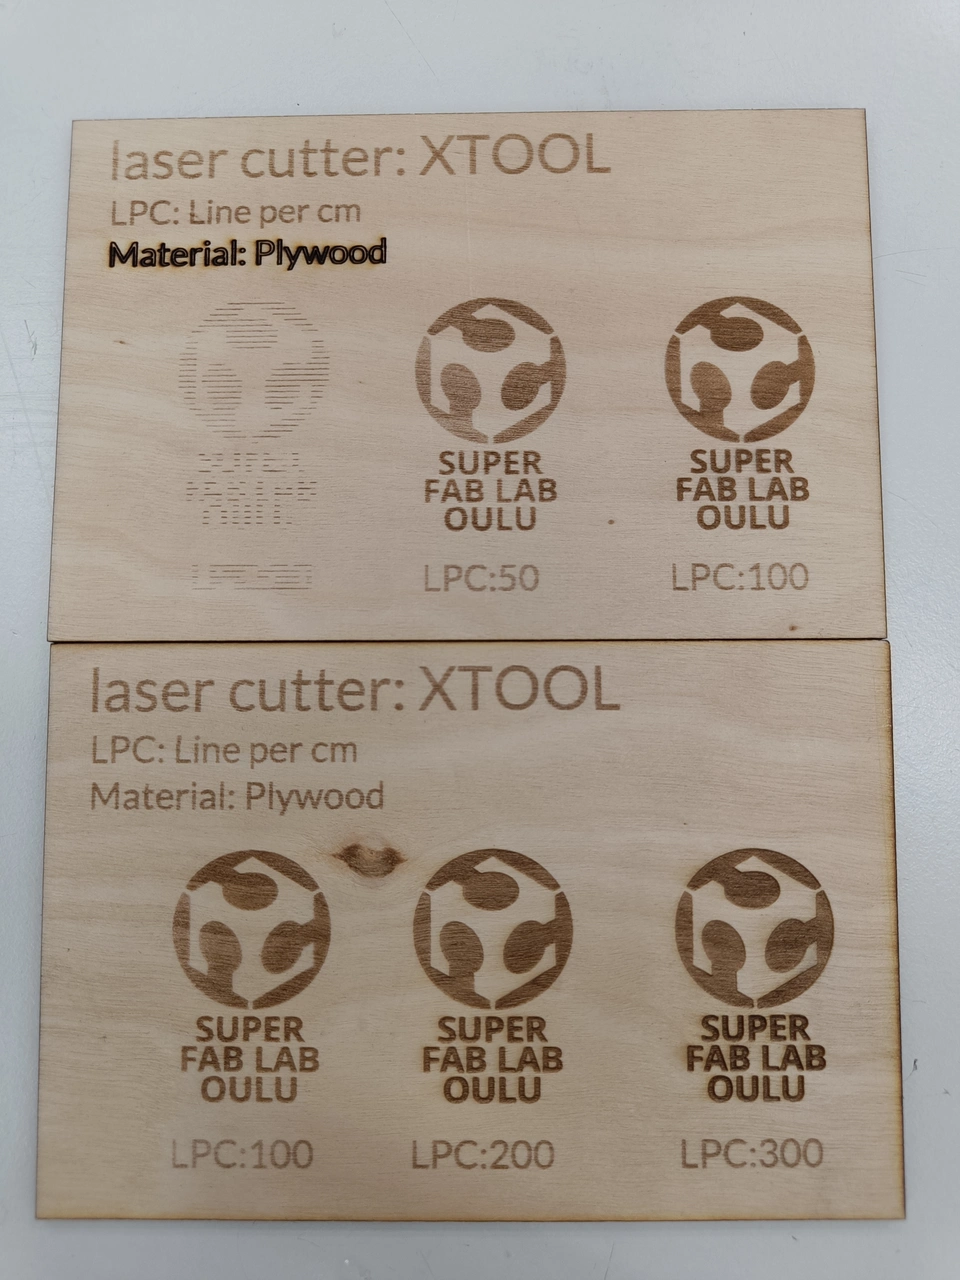
The picture above shows the results of different XTools settings on 3mm plywood.
The icons demonstrate the difference in the results when using different LPC (lines per centimeter) settings.
This most heavily impacts images as af images consitantly gain benefits from more lines as you are able to make the image look more sharp and less faded. A really low setting like 30 will result in a faded look that looks like a broken reciept printer (photo?)
The 10 and 50 LPC engravings are so shallow that you almost can't feel them when you trace your finger on top of them. On the other hand, the 300 LPC engraving is around 0.5mm thick.
We also tried to use score setting with 100% power and 30mm/s speed on the "Material: Plywood" on the top panel. As you can see from the picture, only the outlines are engraved, and the lines are much darker and deeper.
Power & Speed
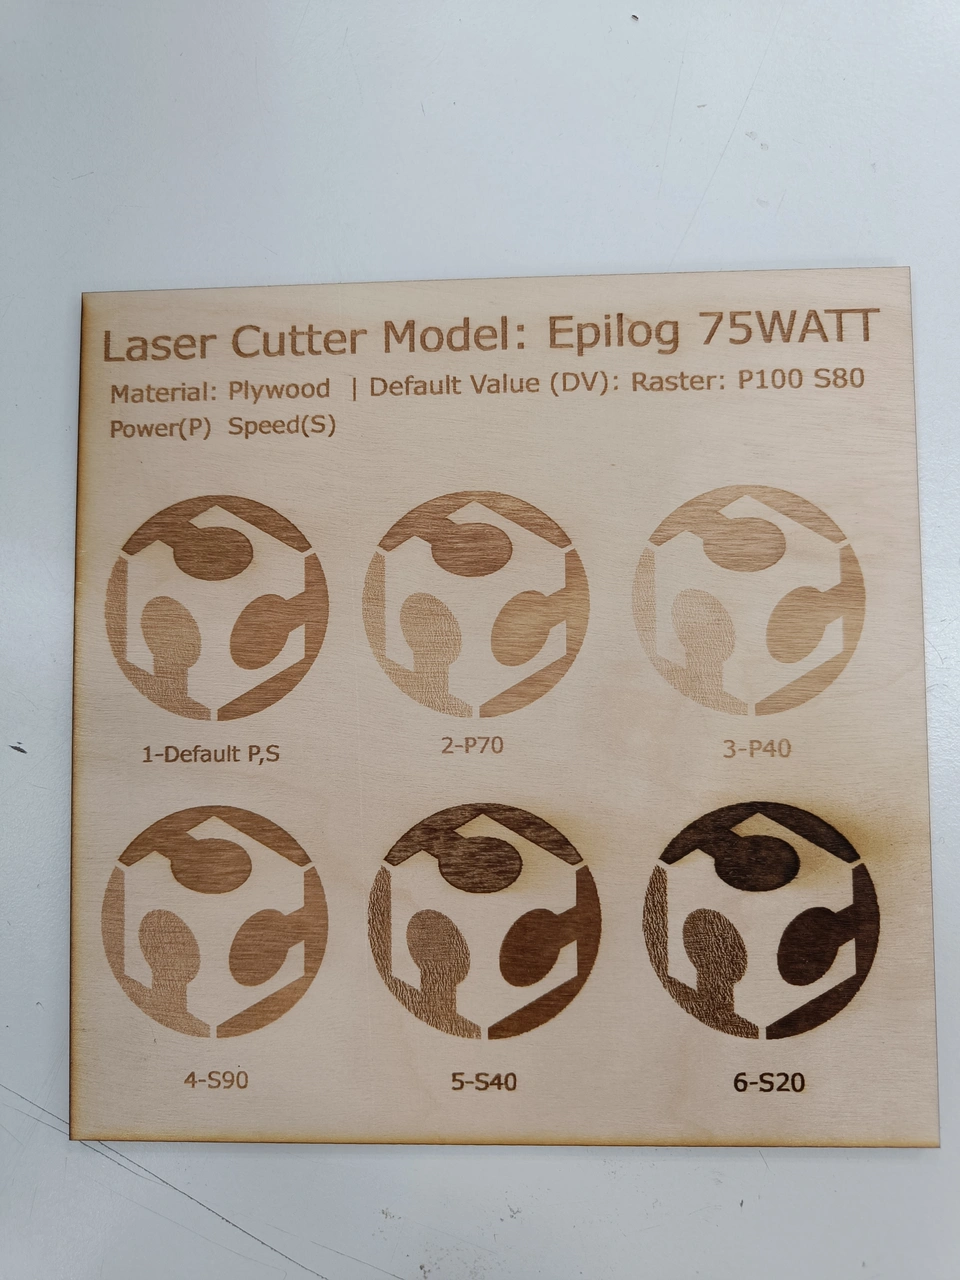
We made a test engraving on a piece of plywood to see the correlation on changing the speed and power parameters. Decreasing the power made the engraving dimmer since there is less energy transferred to the material. The opposite happened when we decreased the speed and it made the engraving darker. Since the laser stayed longer in one area with lower speeds it transferred more energy with the same power.
Kerf and joint clearance
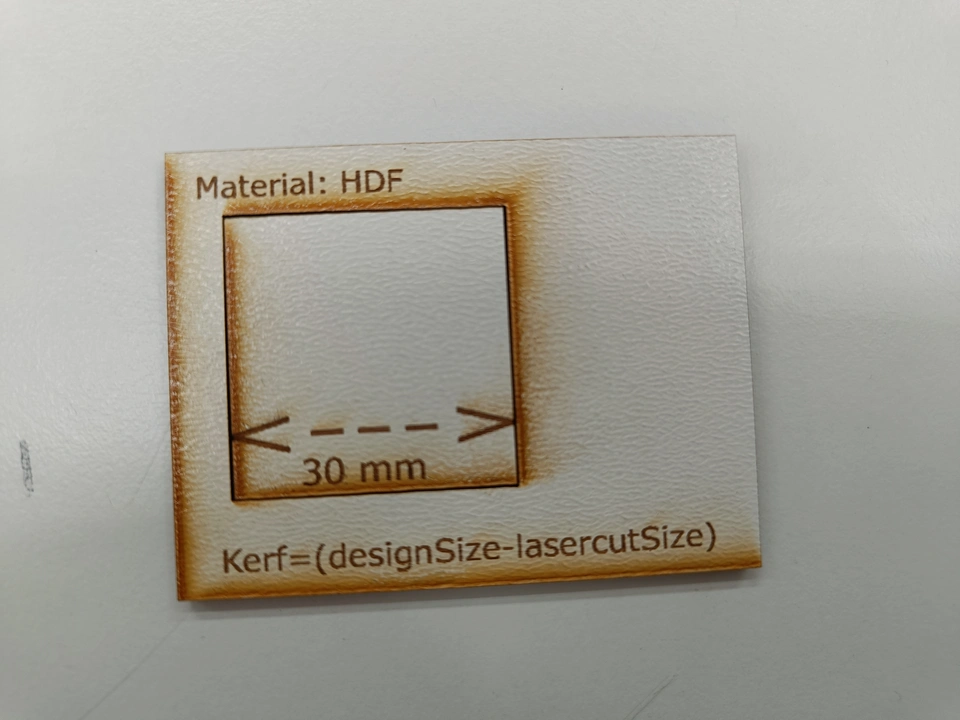 This is the cut we created to measure the kerf of the Epilog laser. The kerf is same as the cut width of the laser. It can be measured by subtracting the cut width from the actual design width.
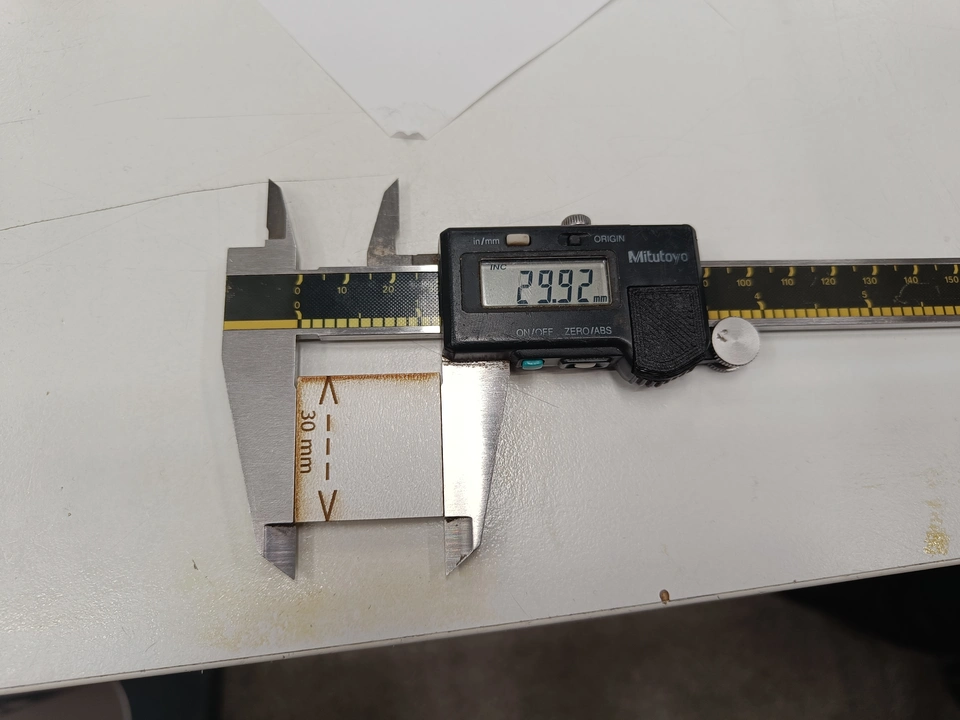
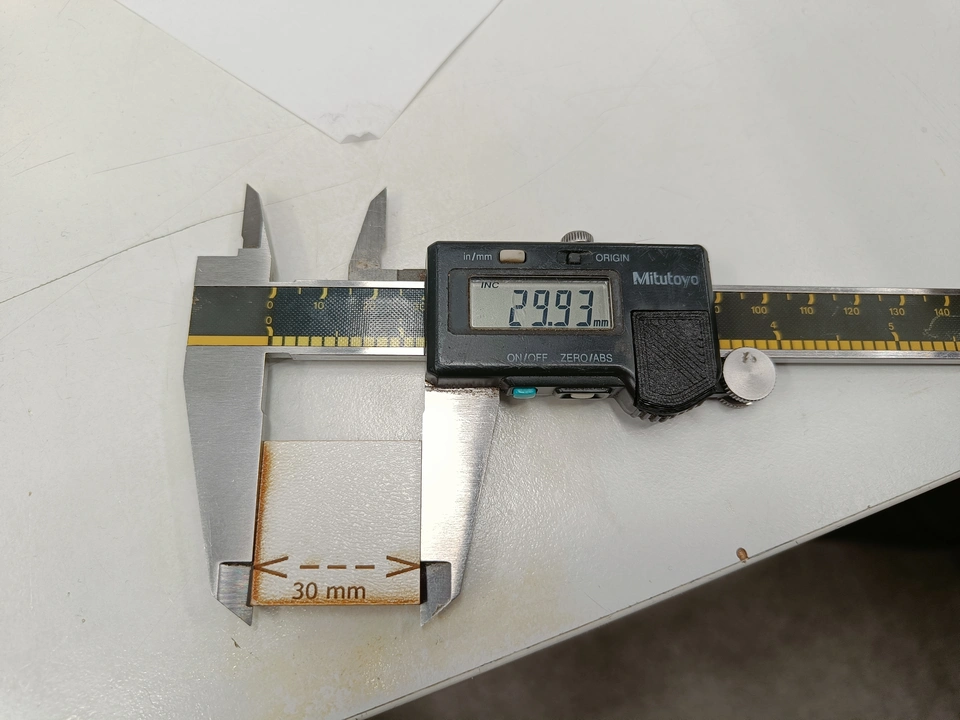 The kerf of the Epilog laser is measured to be ~0.08mm
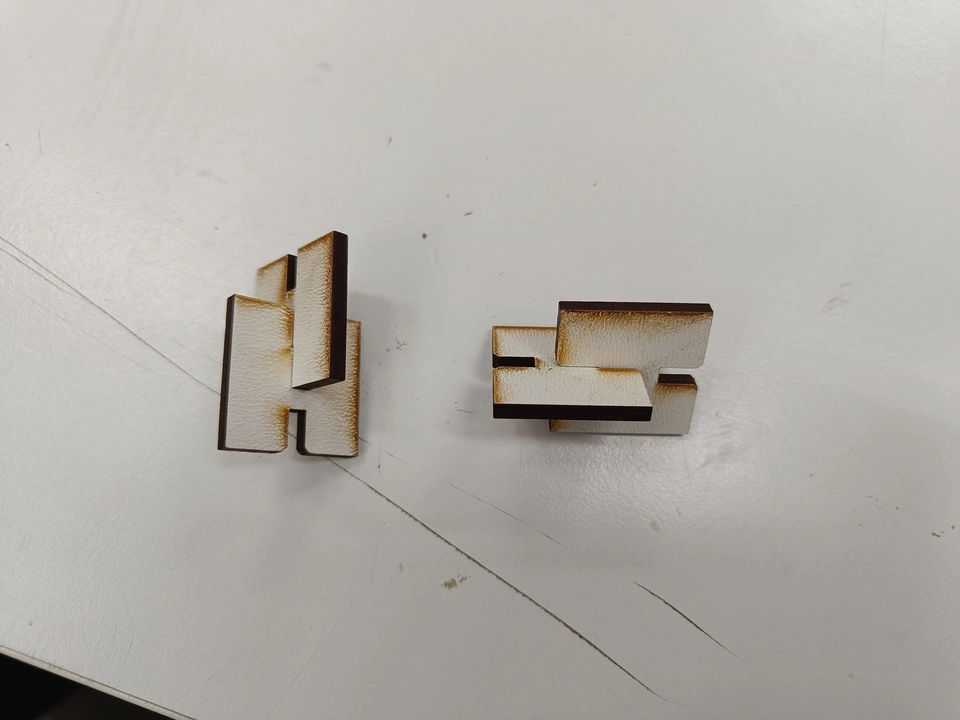 We designed these small pieces using the 0.08mm kerf to test the fit of the joint clearance. The fit is a little loose so we should use bigger kerf to achieve tighter fit.
Focus
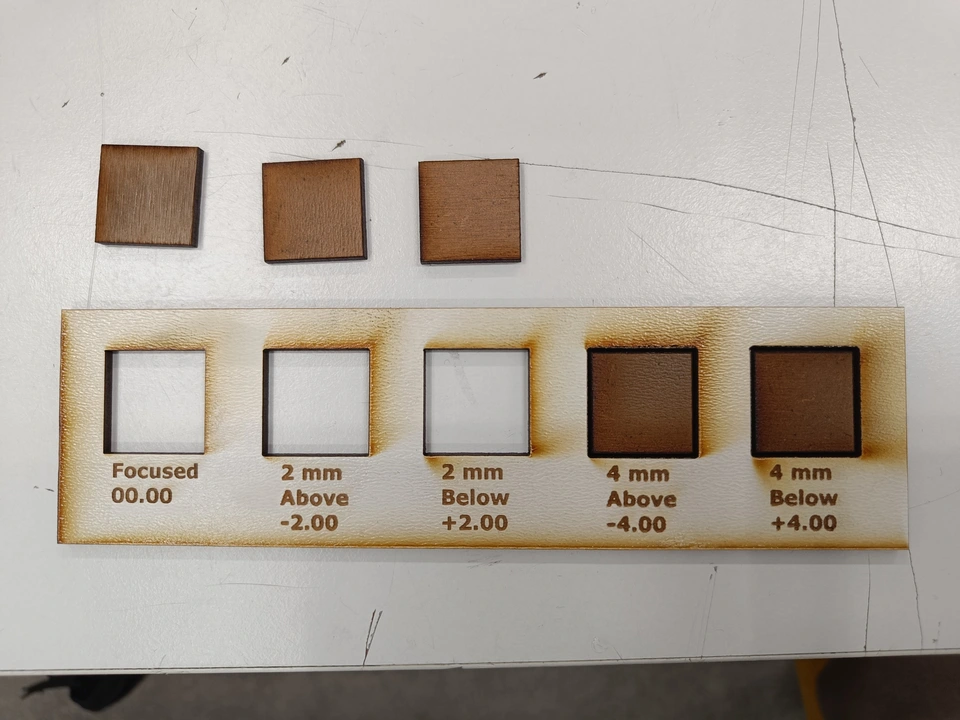 In the image you can see the effects of diffrent focus levels on the epilog laser cutter.
The focus setting changes how high or how low from the original focus level the laser is shifted.
Focus changing shown in image
When the focus is changed only 2mm it doesnt have much effect on the thinner 3mm material. However, once the focus is shifted to 4mm the peices are stuck in place and not fully cut out of the material.
Last classes assignment
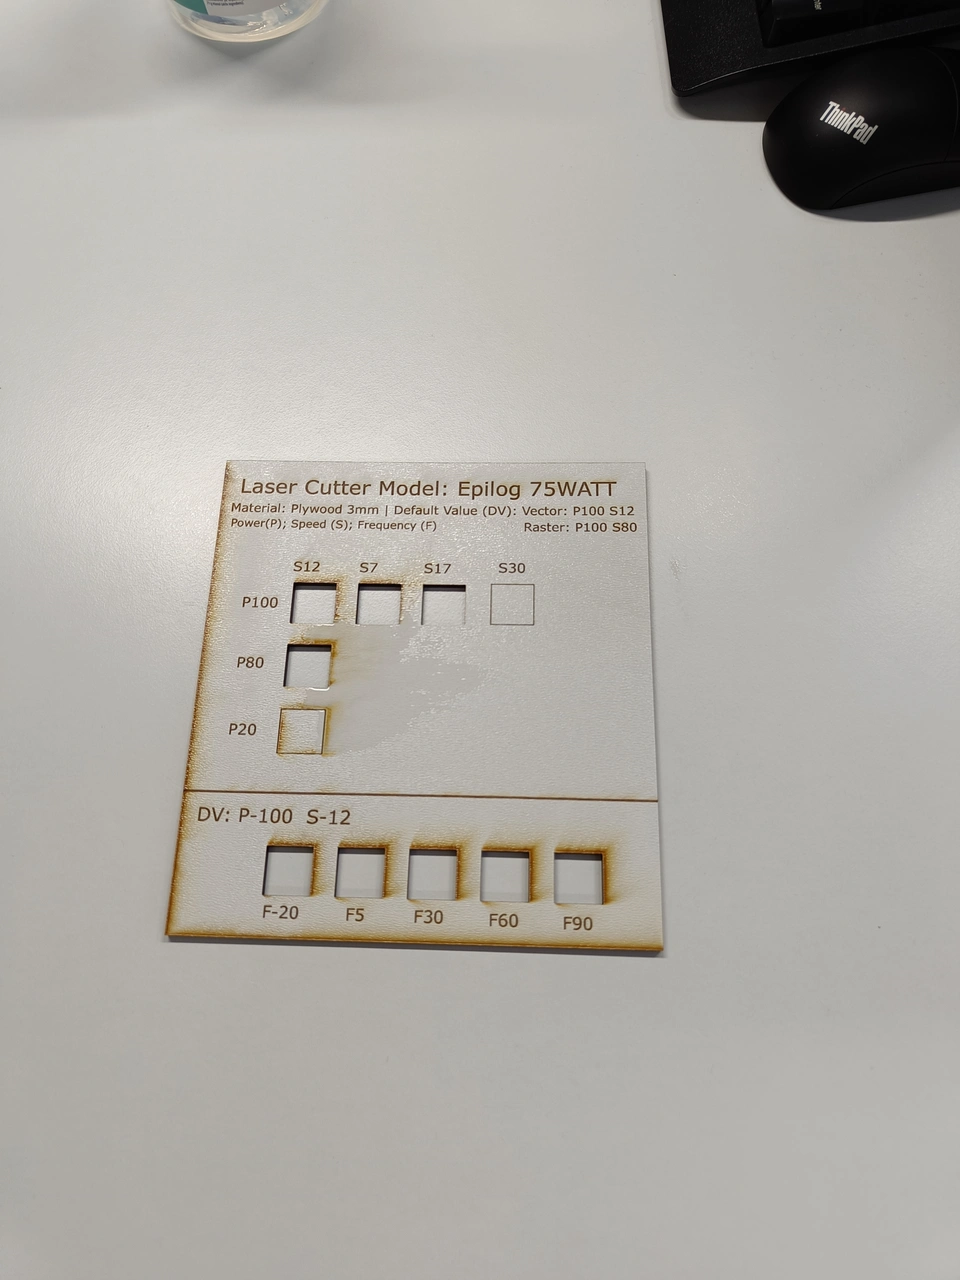 In this cut we used color encoding to set the speed, power and frequency. S=Speed, P=Power, F=Frequency
Reflection
This week we learned to use 2 different laser cutters and their software. We learned the effect of 6 different properties of laser cutters on the resulting cut and how to tune them. The exercises were simple and demonstrated well the importance of correct settings on the cut.
Laser safety training
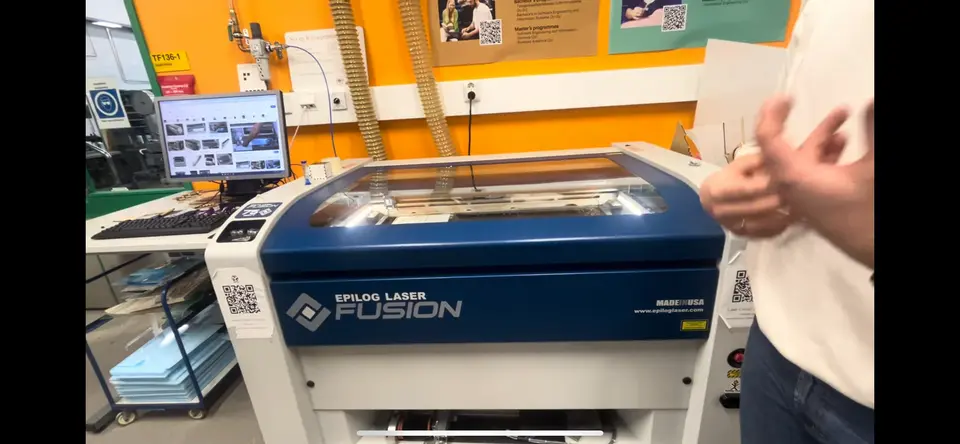
- Turn on the air assist , it compresses the air for the laser .
- Lock your eyes on the laser while it is working .
-
Fire hazard: Materials such as plywood or cardboard are highly flammable if the machine's belt breaks and the laser is fixed in one spot .
-
Fire handling:
Small fire: Open the lid (the machine will stop immediately thanks to the lid sensor), remove the material and extinguish it .
Large fire: Use a fire blanket to cover the area and cut off the oxygen supply.
Use a fire extinguisher if necessary and notify everyone to evacuate .
Eye protection: The machine's glasses block infrared radiation, so looking directly at the cutting process is safe, but absolutely do not operate with the lid open as the invisible laser beam can cause permanent eye damage.