Group Nguyen Le
Group members
- Khai Nguyen
- Hoang Bach Nguyen
- Quynh Anh Le
Group Assignment: Toolchain & Development Workflow Comparison
Objective
To demonstrate and compare different development toolchains, workflows, and embedded architectures by implementing three distinct projects:
- Desktop GUI control of hardware (Arduino + Python)
- Web-based remote control (ESP32C3 Web Server)
- Direct Python hardware control (QPAD)
Comparison Overview
| Aspect | Khai: Lightbulb Toggle | Bach: Web Server | Quynh Anh: QPAD |
|---|---|---|---|
| Platform | Arduino Uno + Python (PyQt5) | XIAO ESP32C3 | Python + QPAD |
| Communication | Serial (USB) | WiFi (HTTP) | USB/Serial |
| Interface | Desktop GUI (PyQt5) | Web Browser | Python Script |
| Control Method | Button click in GUI | Web page buttons | Keyboard input |
| Output Device | LED/Lightbulb | LED | LED |
| Language | C++ (Arduino) + Python | C++ (Arduino) | Python |
| Connectivity | Wired | Wireless | Wired |
Member 1: Khai - Lightbulb Toggle (Arduino + Python PyQt5)
Toolchain Description
I implemented a desktop application that controls an LED (simulating a lightbulb) using a PyQt5 graphical user interface. The Arduino handles the hardware control while Python manages the user interface and serial communication.
Hardware Setup
- Microcontroller: Seeed XIAO RP2040
- Input: Button connected to pin D7
- Output: LED connected to pin D6
- Connection: USB Serial communication
Workflow
[User] → [PyQt5 GUI] → [Python Serial] → [Arduino] → [LED]
       (Button Click)    (USB Cable)     (C++ Code)
Code Implementation
Arduino Code (C++):
This file code will control the hardware.
Python Code (PyQt5):
This file will create GUI to control the LED through Serial Monitor.
I also need to git install 2 libraries from python.
Workflow Steps
Arduino Setup:
1.Upload Arduino code to the board
2.Note the COM port (e.g., COM7)
It watches the button, controls the LED, and talks to the PC over USB serial.
Verify it works:
- Go to Tools → Serial Monitor.
- Set the baud rate in the bottom-right corner to 9600.
- Press the physical button on the board (D7). The LED should toggle and you should see a message like 0,1 or 0,0 appear in the Serial Monitor. You can send message through the Serial Monitor to control the LED (
0,1- ON,0,0- OFF) - Close the Serial Monitor before running the Python app — only one program can use the serial port at a time.
Python Setup:
1.Check that Python is installed:

2.Install required libraries: pip install pyqt5 pyserial or pip install -r code-examples/python/lightbulb-toggle/requirements.txt (check carefully the path to the requirements.txt)
PS C:\Users\HOANG KHAI> pip install -r fab-xiao-pr2040-main/code-examples/python/lightbulb-toggle/requirements.txt
Collecting PyQt5 (from -r fab-xiao-pr2040-main/code-examples/python/lightbulb-toggle/requirements.txt (line 1))
  Downloading PyQt5-5.15.11-cp38-abi3-win_amd64.whl.metadata (2.1 kB)
Collecting pyserial (from -r fab-xiao-pr2040-main/code-examples/python/lightbulb-toggle/requirements.txt (line 2))
  Downloading pyserial-3.5-py2.py3-none-any.whl.metadata (1.6 kB)
Collecting PyQt5-sip<13,>=12.15 (from PyQt5->-r fab-xiao-pr2040-main/code-examples/python/lightbulb-toggle/requirements.txt (line 1))
  Downloading pyqt5_sip-12.18.0-cp314-cp314-win_amd64.whl.metadata (516 bytes)
Collecting PyQt5-Qt5<5.16.0,>=5.15.2 (from PyQt5->-r fab-xiao-pr2040-main/code-examples/python/lightbulb-toggle/requirements.txt (line 1))
  Downloading PyQt5_Qt5-5.15.2-py3-none-win_amd64.whl.metadata (552 bytes)
Downloading PyQt5-5.15.11-cp38-abi3-win_amd64.whl (6.9 MB)
   ━━━━━━━━━━━━━━━━━━━━━━━━━━━━━━━━━━━━━━━━ 6.9/6.9 MB 11.5 MB/s  0:00:00
Downloading PyQt5_Qt5-5.15.2-py3-none-win_amd64.whl (50.1 MB)
   ━━━━━━━━━━━━━━━━━━━━━━━━━━━━━━━━━━━━━━━━ 50.1/50.1 MB 40.3 MB/s  0:00:01
Downloading pyqt5_sip-12.18.0-cp314-cp314-win_amd64.whl (59 kB)
Downloading pyserial-3.5-py2.py3-none-any.whl (90 kB)
Installing collected packages: pyserial, PyQt5-Qt5, PyQt5-sip, PyQt5
Successfully installed PyQt5-5.15.11 PyQt5-Qt5-5.15.2 PyQt5-sip-12.18.0 pyserial-3.5
3.Run the Python script (careful with the path to lightbulb_toggle.py)
PS C:\Users\HOANG KHAI> python fab-xiao-pr2040-main/code-examples/python/lightbulb-toggle/lightbulb_toggle.py
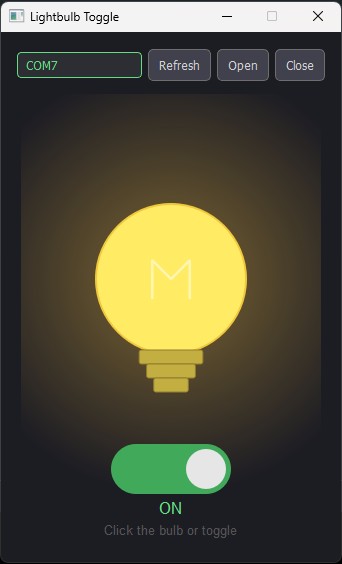
After you run it, a GUI will appear on your screen. Choose the correct USB port (e.g., COM7). Then press Open to start.
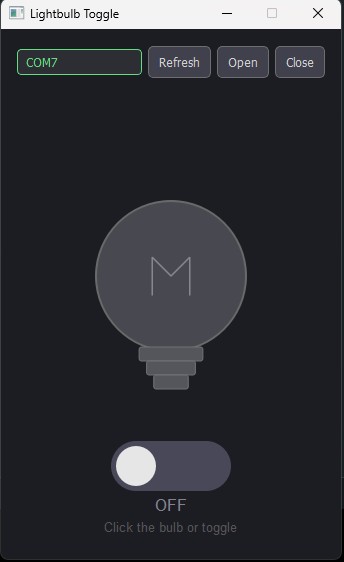
4.Use the toggle button to control the LED
Key Learnings
- Serial Communication: Bidirectional communication between Python and Arduino
- GUI Development: Creating responsive desktop applications with PyQt5
- Event Handling: Button clicks triggering hardware actions
Member 2: Bach - Web Server (XIAO ESP32C3)
Description
Bach implemented a web server on the XIAO ESP32C3 that allows remote control of an LED through a web browser interface. This demonstrates digital control over WiFi.
Click to the link of the walkthrough
Setting up
- Microcontroller: Seeed XIAO ESP32C3
- Output: Built-in LED (or external LED on D10)
- Connection: WiFi
Workflow
From the user, the IDE picks up 3 libraries’ contents:
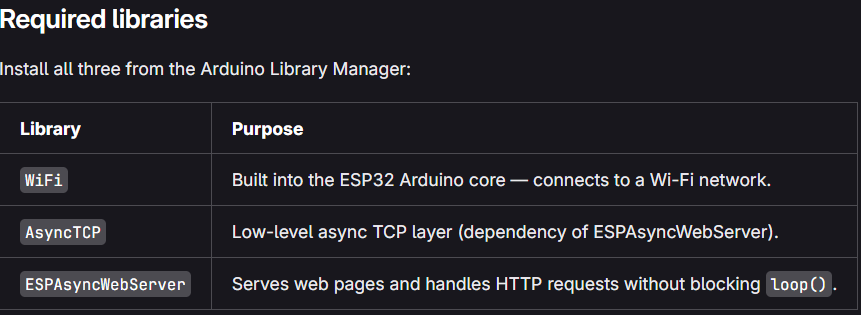
in order to make the preliminaries to launch and implement a website. Then it would be time communicating the circuit through the web.
[User] → [Web Browser] → [WiFi] -> [ESP32C3 Web Server] → [LED]
         (HTTP Request)                                 (C++ Code)
Code Implementation
Arduino Code (C++)
This file code will control the hardware. Web server Cpp code
Workflow
1.Board, Library Setup:
- Install ESP32 board library in Arduino IDE, by Espressif Systems
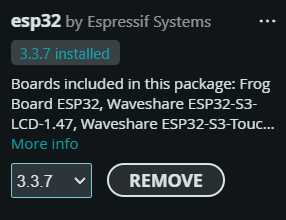
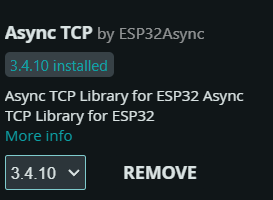
- Install library AsyncTCP by ESP32Async
- And install library ESPAsyncWebServer by ESP32Async
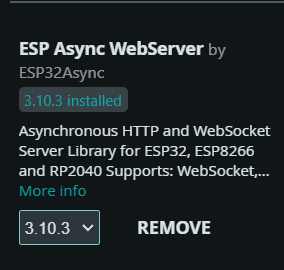
The libraries’ creators should be the same, since they usually update the same contents that suit the board / preliminary libraries.
2.Access Web Server and analyze
Enter the WiFi name, and password, in “double brackets”:
const char* ssid = "MobileFabLab";
const char* password = "oulu2022";
- This code below utilizes the Wifi library, and Connecting to a Wi-Fi network can take a while, so we usually add a while loop that keeps checking if the connection was already established by using
WiFi.status(). When the connection is successfully established, it returns WL_CONNECTED. Which WL_CONNECTED corresponds to status when connected to a WiFi network
WiFi.begin(ssid, password);
  while (WiFi.status() != WL_CONNECTED) {
    delay(1000);
    Serial.println("Connecting to WiFi..");
  }
  // Print the IP address — open this in a browser to see the web page
  Serial.println(WiFi.localIP());
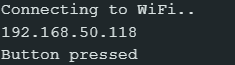
Press Upload then open the Serial Monitor to see the webserver, then paste it to a separate web browser.
3.Control LED:
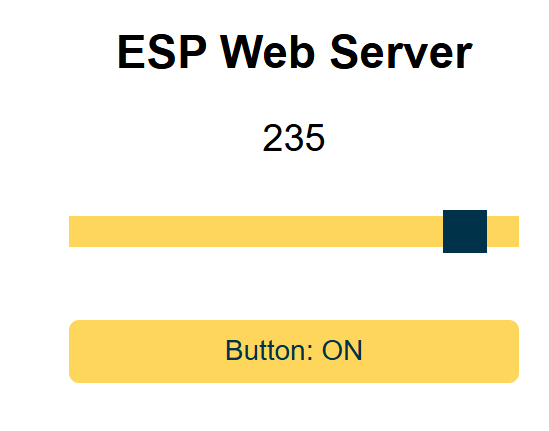
- Page updates with current LED status and brightness. Controlled by slider
Click here to view LED control video
Key Learnings
- WiFi Connectivity: Setting up ESP32C3 as a WiFi client
- HTML/CSS: Creating a responsive web interface from a template
- Basic Concepts: Remote control over network, LED brightness control using PWM
Member 3: Quynh Anh - QPAD (Python)
Toolchain Description
I implemented a bi-directional serial interface between a custom PC companion application (written in Python/PyQt6) and the QPad XIAO RP2040 microcontroller.
Hardware Setup
- Microcontroller: Seeed XIAO RP2040.
- Display: I2C SSD1306 OLED Screen.
- Input: 6 capacitive touch pads functioning as a D-pad (Up, Down, Left, Right) and two action buttons (A, B).
- Connection: standard USB-C cable for both power and bi-directional serial communication.
Workflow
- Sending Text (PC → Hardware):
[User] → [Desktop GUI] → [Python Script] → [USB Serial] → [XIAO RP2040] → [OLED Screen]
    (Types & Sends)   (Formats "0...")     (TX Data)    (Parses text)   (Displays text)
- Reading Inputs (Hardware → PC):
[User] → [Touch Pads] → [XIAO RP2040] → [USB Serial] → [Python Script] → [Desktop GUI]
       (Touches pad)    (Debounces)     (TX "1...")    (Timer Polls)     (Button Glows)
Code Implementation
Arduino Code (C++):
This file code will control the hardware.
Python Code (PyQt):
This file will create GUI, featuring a custom layout that visually mirrors the physical QPad.
Workflow Steps
1.Setup:
- Install necessary libraries on Arduino.
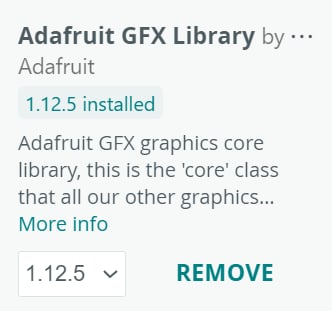
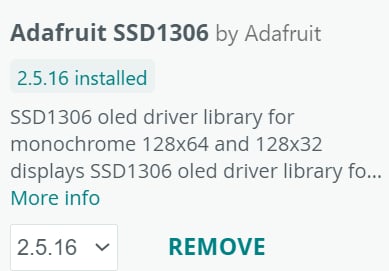
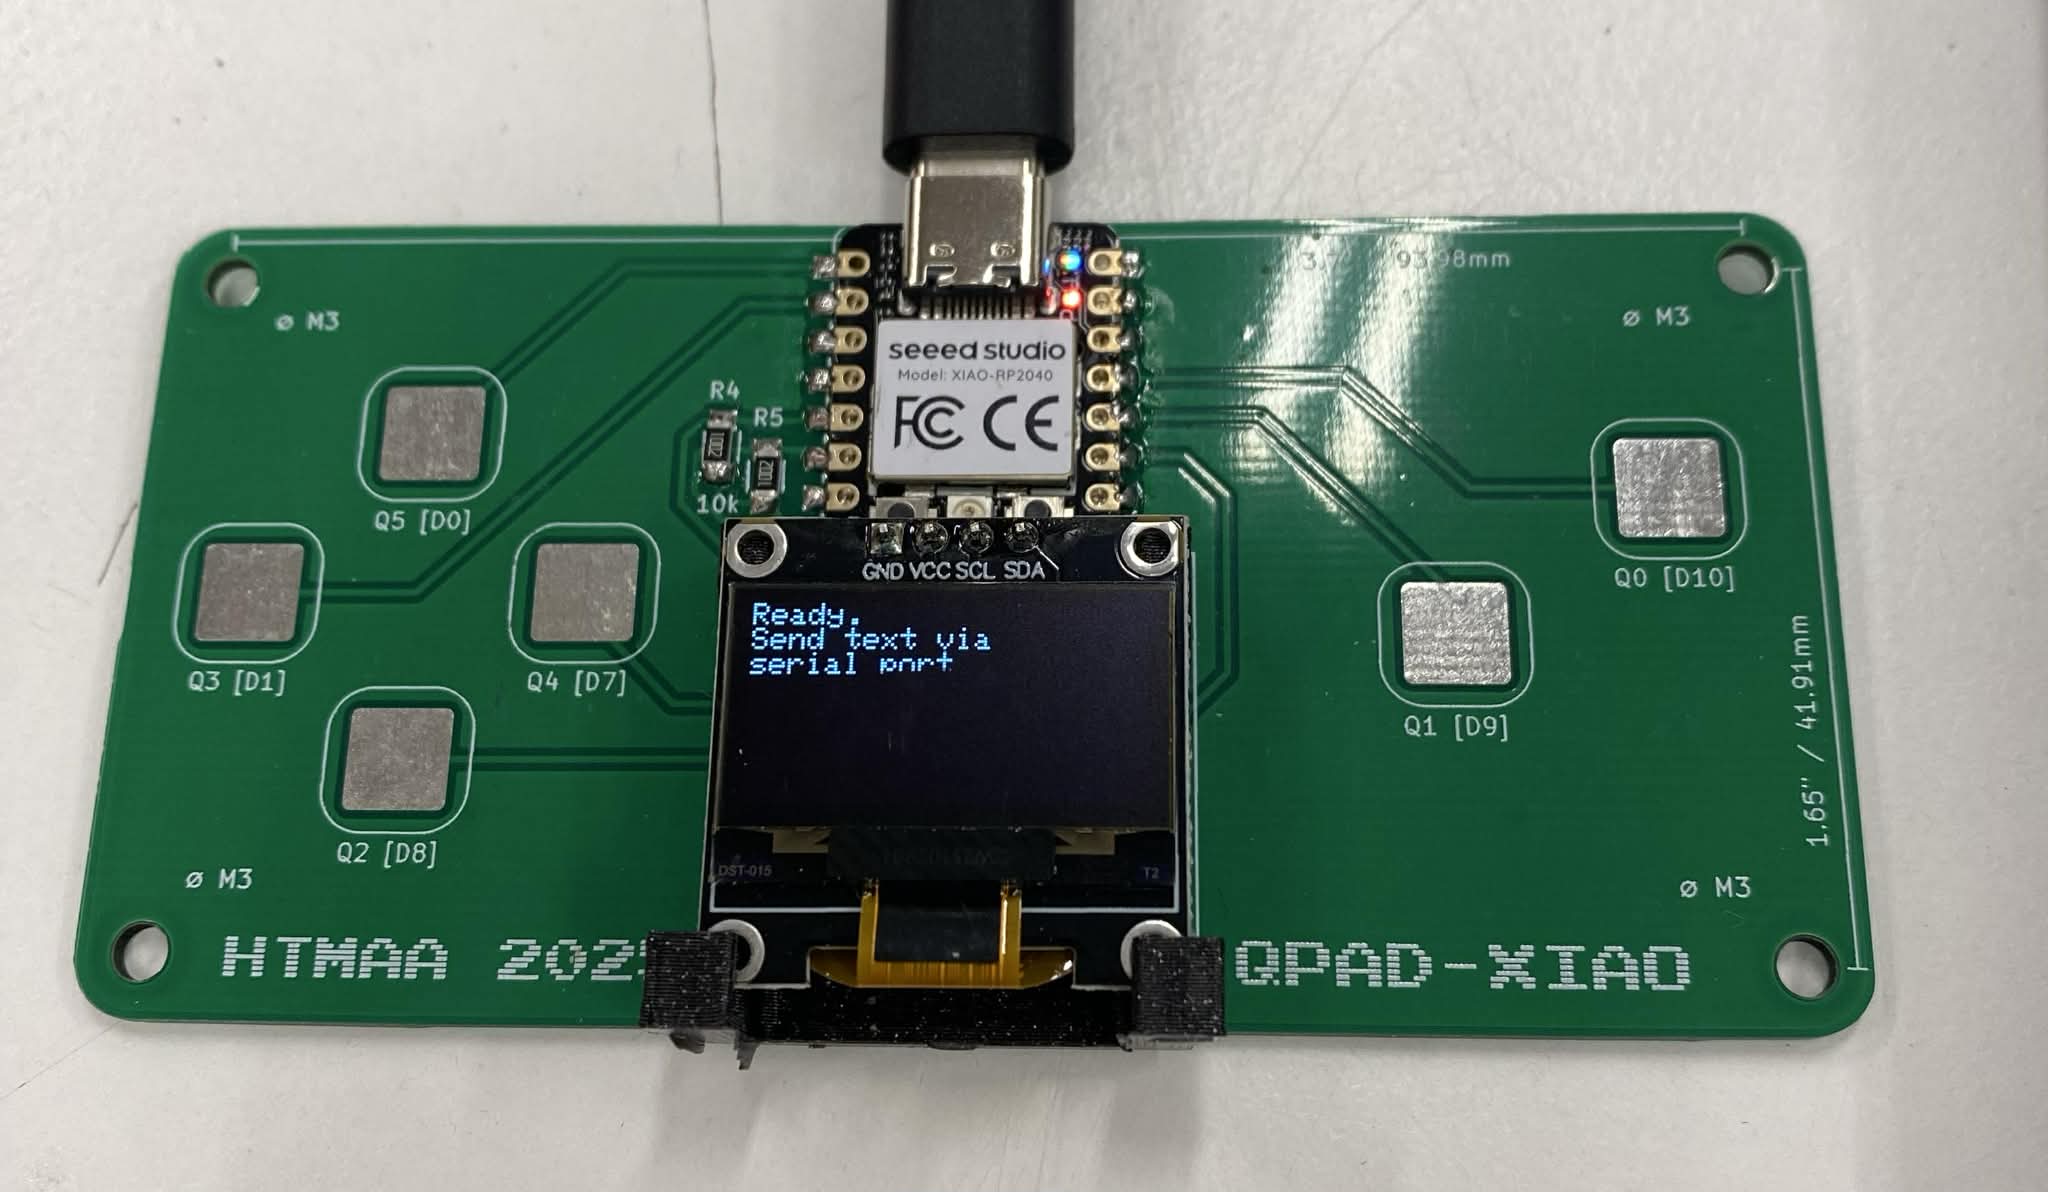
- Flash the provided C++ sketch (
serial-display.ino) to the QPad using the Arduino IDE. The OLED will display Ready. upon a successful boot.
-
Open your terminal, navigate to the Python code folder, and create/activate a virtual environment (
python -m venv venv). -
Install the required dependencies by running
pip install PyQt6 pyserial.
2.Run QPAD:
-
Launch the companion app by running
python serial_display.pyvia VS Code. -
In the application window, click Refresh to detect available connections, select your QPad's COM port from the dropdown, and click Open to establish the serial link.
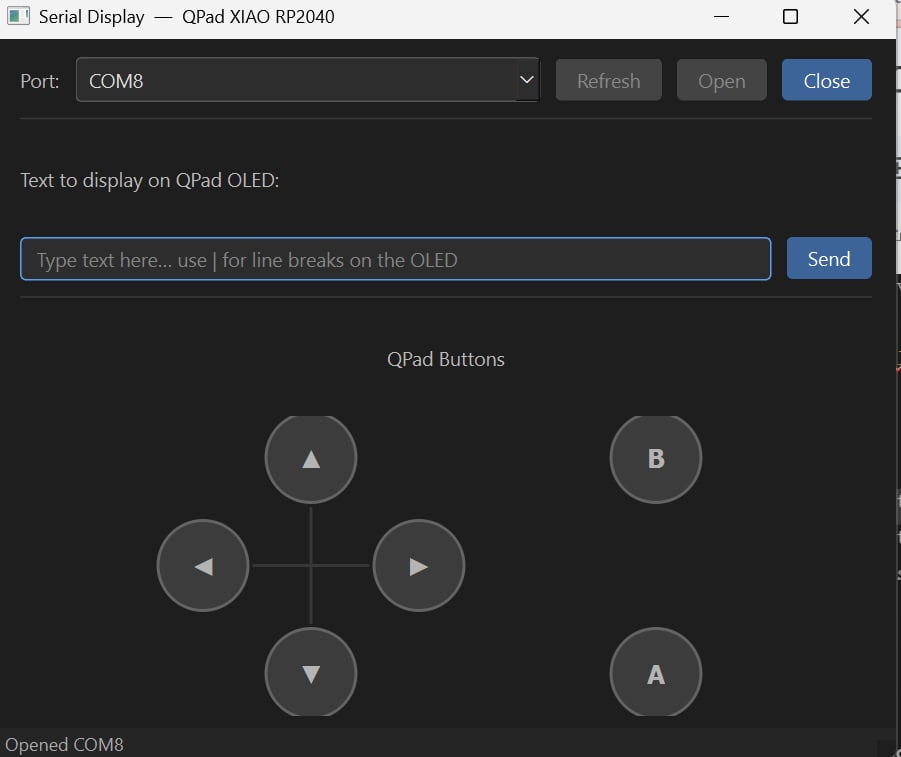
3.Controls:
-
PC → OLED: Type a message into the app's text field and press Send (or Enter) to push the text to the physical screen. Use the
|character to create manual line breaks.
Send Message To OLED VIDEO -
Hardware → PC: Touch any of the six capacitive pads (A, B, UP, DOWN, LEFT, RIGHT) on the QPad. The corresponding digital button on the desktop GUI will light up and glow in real-time.
Touchpad VIDEO
Key Learnings
- UI and hardware setup Understand how to set up code for UI interface and hardware control.
- Keyboard Input Handling: Non-blocking keyboard detection.
- Class-Based Design: Object-oriented approach for hardware control.
Toolchain Comparison Matrix
| Criteria | Khai (Arduino + PyQt5) | Bach (ESP32C3 Web) | Quynh Anh (QPAD Python) |
|---|---|---|---|
| Setup Complexity | Medium | High | Low |
| Programming Languages | C++, Python | C++ | Python |
| Learning Curve | Steep (GUI + Serial) | Medium (Web + WiFi) | Gentle (Python basics) |
| Hardware Required | Arduino, USB cable | ESP32C3, WiFi | Arduino, USB cable |
| User Interface | Desktop GUI | Web Browser | Command Line |
| Accessibility | Local only | Any device on network | Local only |
| Real-time Response | Good | Good (depends on WiFi) | Excellent |
| Debugging Tools | Serial Monitor, Print | Serial Monitor, Browser DevTools | Print statements, REPL |
| Portability | Requires Python env | Any device with browser | Requires Python env |
| Best Use Case | Desktop control apps | IoT, remote monitoring | Quick prototyping |
Workflow Comparison
Khai: Arduino + Python PyQt5
┌─────────────┐     ┌─────────────┐     ┌─────────────┐
│  Write C++  │────▶│   Compile   │────▶│   Upload    │
│   Code      │     │   Arduino   │     │  to Board   │
└─────────────┘     └─────────────┘     └─────────────┘
                                              │
                                              ▼
┌─────────────┐     ┌─────────────┐     ┌─────────────┐
│  Run Python │────▶│   Connect   │────▶│   Control   │
│   Script    │     │   Serial    │     │    LED      │
└─────────────┘     └─────────────┘     └─────────────┘
Bach: ESP32C3 Web Server
┌─────────────┐     ┌─────────────┐     ┌─────────────┐
│  Write C++  │────▶│   Compile   │────▶│   Upload    │
│   Code      │     │   ESP32     │     │  to Board   │
└─────────────┘     └─────────────┘     └─────────────┘
                                              │
                                              ▼
┌─────────────┐     ┌─────────────┐     ┌─────────────┐
│  Get IP via │────▶│  Open Web   │────▶│   Control   │
│   Serial    │     │   Browser   │     │    LED      │
└─────────────┘     └─────────────┘     └─────────────┘
Quynh Anh: QPAD Python
┌──────────────┐    ┌──────────────┐    ┌──────────────┐
│  Write C++   │───▶│   Compile    │───▶│    Upload    │
│  (Arduino)   │    │   Arduino    │    │   to QPad    │
└──────────────┘    └──────────────┘    └──────────────┘
                                                │
                                                ▼
┌──────────────┐    ┌──────────────┐    ┌──────────────┐
│  Run Python  │───▶│   Connect    │───▶│ Bi-Direction │
│    Script    │    │    Serial    │    │   Control    │
└──────────────┘    └──────────────┘    └──────────────┘
Group Reflection
Common Challenges
| Challenge | Khai | Bach | Quynh Anh |
|---|---|---|---|
| Connection Issues | COM port detection | WiFi credentials, IP finding | Serial port access |
| Debugging | Two codebases to debug | Network latency issues | Keyboard library permissions |
| Learning Curve | PyQt5 widgets, signals | ESP32 board support, HTML/CSS | Python serial communication |
Key Takeaways
From Khai's Experience:
- PyQt5 provides a professional-looking desktop interface
- Serial communication is reliable but requires correct port selection
- Event-driven GUI programming is different from typical embedded loop
From Bach's Experience:
- ESP32C3 WiFi capability opens IoT possibilities
- Web interface is platform-independent
- Need to handle network stability and security
From Quynh Anh's Experience:
- UI frameworks like PyQt6 provide a powerful, object-oriented way to build custom embedded companion apps quickly.
- Bi-directional integration seamlessly bridges physical hardware interactions with digital interfaces in real-time.
Lessons Learned
1.Toolchain Selection: Choose based on project requirements:
- Desktop control → Python + GUI
- Remote/IoT → WiFi-enabled board + web interface
- Quick prototyping → Python with serial
2.Communication Protocol: Each approach uses different protocols:
- Serial (USB) → Simple, reliable, wired
- HTTP (WiFi) → Remote access, wireless, more complex
- Direct GPIO → Fastest, requires compatible hardware
3.User Experience:
- GUI applications (PyQt5) offer rich visual feedback
- Web interfaces (ESP32) are accessible from any device
- Command-line tools (QPAD) are lightweight and quick
4.Development Efficiency:
- Python speeds up development but may have performance overhead
- C++ (Arduino) is more efficient for hardware control
- Hybrid approaches (Python frontend + C++ backend) combine best of both
Conclusion
This group assignment successfully demonstrated three different approaches to embedded system control:
| Member | Approach | Strengths | Weaknesses |
|---|---|---|---|
| Khai | Arduino + PyQt5 | Professional GUI, reliable serial | Requires Python environment, wired |
| Bach | ESP32C3 Web Server | Wireless, any device access | WiFi setup, network dependency |
| Quynh Anh | QPAD Python | Simple, quick prototyping | Basic interface, wired |
Each approach has its place in embedded development. The choice depends on factors like:
- Required user interface (GUI, web, or CLI)
- Connection type (wired vs wireless)
- Development time and complexity
- Target users and their technical comfort level
This comparison highlights the versatility of embedded systems and the importance of selecting the right toolchain for the specific application requirements.